Showing posts with label tape. Show all posts

Wednesday, December 11, 2013

Press Stage 2

In past years I have created the graphic on cotton cloth or on paper, but this year my sister (Emily) and I decided to create the graphic directly on the wood core.  In order to do this, we wanted to first stain the wood to get a deeper background color.  I wasn't sure if this epoxy would still stick to the stain, so I performed a test.


The test showed that although the epoxy didn't stick as well on the stain as on bare wood, it would be sufficient to keep the top sheet on during use.  Based on the successful test, I stained both skis.


Next, my sister, with a small amount of help from me, painted the ski graphic.  The graphic is based on Revelation 19:11-13:

11 I saw heaven standing open and there before me was a white horse, whose rider is called Faithful and True. With justice he judges and wages war. 12 His eyes are like blazing fire, and on his head are many crowns. He has a name written on him that no one knows but he himself. 13 He is dressed in a robe dipped in blood, and his name is the Word of God.
  
The graphic was intentionally made with great detail on the tail of the ski and with much less detail at the tip.


Next the skis were put in the press. A full sheet of fiberglass was not place on the top of the ski, only a narrow strip was placed on each edge of the ski.


The flashing was trimmed off with a jig saw and the edges were finished with a bench top belt sander and hand belt sander.


The final step was to peel off the tape that was protecting the top sheet and base.  This was done relatively easily, but it would have helped if the tape was a little thicker to prevent it from tearing.


Prior to pressing the skis, I placed a nameplate at boot center on each ski.
 

 The only thing left to do is mount the bindings and tune the skis.


Sunday, July 1, 2012

Base Preparation


This year I bought gray Isospeed 7200 p-tex base material.  I chose this material because I had good results with it on the Panjshirs last year.  Also, I was told by my ski shop that this material was easier to grind than a similar Durasurf product.  Additionally, this material is abraded on both sides so less grinding is necessary to get the ski ready for wax.  The edges have a 1.33mm step, are sand blasted, and made from hardened steel.

  
The first step in preparing the base is to cut the base material using the template made earlier.  The base material is easily cut with a razor blade as long as it is clamped down.

Next the edges are clamped and tacked in place using superglue.  As in years past, I did not wrap the edge around the tip or tail, but ran it to the point where the tip and tail radius began.  This makes the edge simpler to manufacture and lightens the ski a small amount.


Once the edges are tacked in place, the base must be covered with tape in order to protect it from epoxy.  The tape also helps to secure the edges in place so they do not shift during pressing.

I chose to use contact paper this year instead of tape because one pass could cover the entire base (vs 3 or 4 tape passes).  Having a single sheet will prevent ridges from forming where the tape overlapped (ridges form during pressing - this means less base grinding is needed later).  Also, the contact paper should be easier to remove than tape because it is a bit thicker.  In order to apply the contact paper, I first set it outside in the ~100 degree sun and softened it up a bit.  Next, I stuck one end in place, then lined up the sheet and began to unroll it onto the base.  Once done, a cloth was rubbed over the surface to ensure a good bond.


A razor blade was then used to trim the excess contact paper from the base.


The base is now ready for pressing.


Sunday, December 25, 2011

Post Job Assessment

After I finished the skis I decided that some stiffness testing was in order.  The stiffness of a ski is critical to its performance.  A backcountry or powder ski needs to be lighter and can be softer.  The soft snow is more forgiving and high speeds are not typically achieved.  An east coast carving ski needs to be relatively stiff to hold an edge at high speeds and avoid vibration.  To test the ski stiffness I placed weights on the ski and measured the deflection.  After searching my house for weights I only found two 5 lb weights.  Since a gallon of water weighs approximately 8 lbs, I filled a bucket up with two gallons to get an additional 16 lbs.

I tested all the skis that I have to get a good comparison.  The goal with the skis this year was to design them so that they would be stiffer that the first generation Goliaths and softer than the second generation Goliaths and Tomahawks. This goal was achieved.  In order off stiffness, here is how my skis rank up from stiffest to softest.
  1. Tomahawk
  2. Arlia (M)
  3. Arlia (R)
  4. Panjshir
  5. Elan Silver Magic
  6. Blizzard Titan
  7. K2 Kung Fuja
  8. Goliath V1
The graph below shows the test results when 5, 10, and 26 lbs was applied to each ski.  Note that I tested the Arlia and Panjshir prior to attaching the second layer of fiberglass and topsheet; these results are noted by a (PC) after the name.


The calculations that I performed prior to building the skis are summarized in the table below.  These calculations did not take into account the stiffening properties of the epoxy.  The test results show that the epoxy has an average 4.18 stiffening factor for non-metal skis and around 2.4 for skis with metal built into the core.  The skis I built with metal rods in the core were very stiff and therefore the epoxy had less of an effect on the stiffness.  Since I don't have a pair of the second generation Goliaths I could not test the stiffness (these skis belong to my brother).
Overall the skis turned out as I expected and have a stiffness within the range that I had hoped for.  The following is a summary of what I have learned this season:
  1. Rather than packing tape, use contact paper to protect the base and top sheet as the application and removal would be easier.
  2. The cost of printing out full size templates is worth while.  In the past I printed out the templates on 8.5 x 11 paper and taped the sheets together.  This worked, but the skis were never quite straight.
  3. Assuming a mold springback of 15 mm is safe.  The Arlia mold was designed with a 30 mm camber and came out at 15 mm, as planned.
  4. Paper is a good medium for appling graphics (acrylic paint) and when soaked in epoxy becomes 70-90% transparent.  Cotton cloth still works well for opaque solid colors.  Solid colored construction paper may work well also.
  5. If a cap construction is used rather than a plastic sidewall, then the sides of the skis must be sealed to make sure the core is sealed after edge grinding.
  6. 120 grit sand paper / grinding wheel is appropriate for edge grinding.
  7. A course jig saw blade works best when trimming flashing off of the skis after pressing.
  8. Isospeed 4400 p-tex base material grinds more easily than Durasurf 4001 p-tex base material.  This is likely due to the Isospeed material being slightly harder than the Durasurf material.
  9. West Systems Epoxy, 150B Resin / 206B Slow hardener wets up easily and provides enough time for lay-up without hardening.  The pumps are worth buying to easily measure out the epoxy.
  10. Mounting edges on the ski mold effectively holds the base in place during pressing and simplifies the process.

Tuesday, November 8, 2011

Post Processing

Once the skis have been fully pressed, the flashing must be trimmed off and the edges sanded to remove excess epoxy, fiberglass, and topsheet.  Trimming the flashing can be done with a jigsaw or bandsaw; in this case I used a jigsaw.  Note that the blade will heat up quickly and will have to be cooled throughout the trimming process.  I recommend a coarse blade.

The easiest way to trim the flashing is to turn the ski over and cut from the bottom side, using the edge as a guide for your blade.  A dust mask is helpful if you want to enjoy a lifetime use of your lungs.  Protection for your ears and eyes is also recommended for the same reason.


Once the flashing is trimmed off the ski, the edges, including the tip and tail, need to be sanded.  To sand the edges, I find it easiest to clamp the ski on a work bench while supporting the camber of the ski.  A belt sander will do the best job in this case.


To sand the tip and tail I find it easiest to move the ski against the sander vice moving the sander about the ski.  If you have a bench top belt sander, this will work best; I do not have one (yet) so I clamped my belt sander to a work table.  I work the ski from the steel edge towards the tip or tail; this will maintain a nice curve.


Once this is finished, the only production work left on the ski is to remove the protective tape from the tip and the tail.  This is a brute force operation and can be time consuming, but it is always worthwhile to protect the top sheet and base so it looks clean at the end.


I have decided that although packing tape works well to protect the ski from damage during production, it is too much of a pain to use again.  I spent several hours removing the tape from these skis; fortunately, it was during the Steelers game so I did not mind too much.  In the future I recommend the use of a thicker tape.  The problem with packing tape is that it tears very easily which makes removal difficult.  A six inch wide piece of clear contact paper would work far better.  The contact paper is thicker and will not tear easily and is just as sticky.  If you buy an 18 inch wide roll I suggest cutting the whole role to size with a hack saw.


The production portion of the ski making process is now finished.  The base must still be ground, the edges sharpened, the base waxed, and the bindings mounted.  I will let Cycle Sport and Ski do this work for me.

The finished skis:


Sunday, November 6, 2011

Graphics and Press stage 2

There are many options for graphics and most of them are relatively simple to create.  In industry they typically print the design directly onto the plastic top sheet or on a separate layer.  I don't have the technology needed to print directly onto a topsheet, although, I have taken steps toward this method. I just need a larger printer which is not in the budget...


I took two approaches to the graphics this year. The first method was to paint onto paper and directly on to the wood of the ski.  Painting on these two mediums is easily done with acrylic paints.  The paint on the wood will be slightly obscured due to the fiberglass layer between the wood and the top sheet.  The fiberglass becomes mostly clear when soaked in the epoxy.  The paper when soaked in epoxy will become ~75% transparent. The second approach, which I have taken in the past, was to get a sheet of fabric, purple in this case, and paint directly on it.  The advantage to this is that the fabric will be very opaque and you can get a solid color, but it absorbs a lot of epoxy and will add weight to the ski.

Some past designs:

2010 Goliath

 2009 Goliath, this is still one of my favorite graphics.


The Arlia's I am making for Megan have a cardinal as the focal point and are relatively simple.  I wanted the wood to show as part of the graphic as well.  Emily helped me paint the skis; I owe most of the credit to her.


I always place a horizontal line across the ski to indicate the binding center.  Note that this is not necessarily the center of the ski and will often be slightly back of true center.  Without this line it would be difficult to mount the bindings properly.  I also always put my JH symbol on the skis.

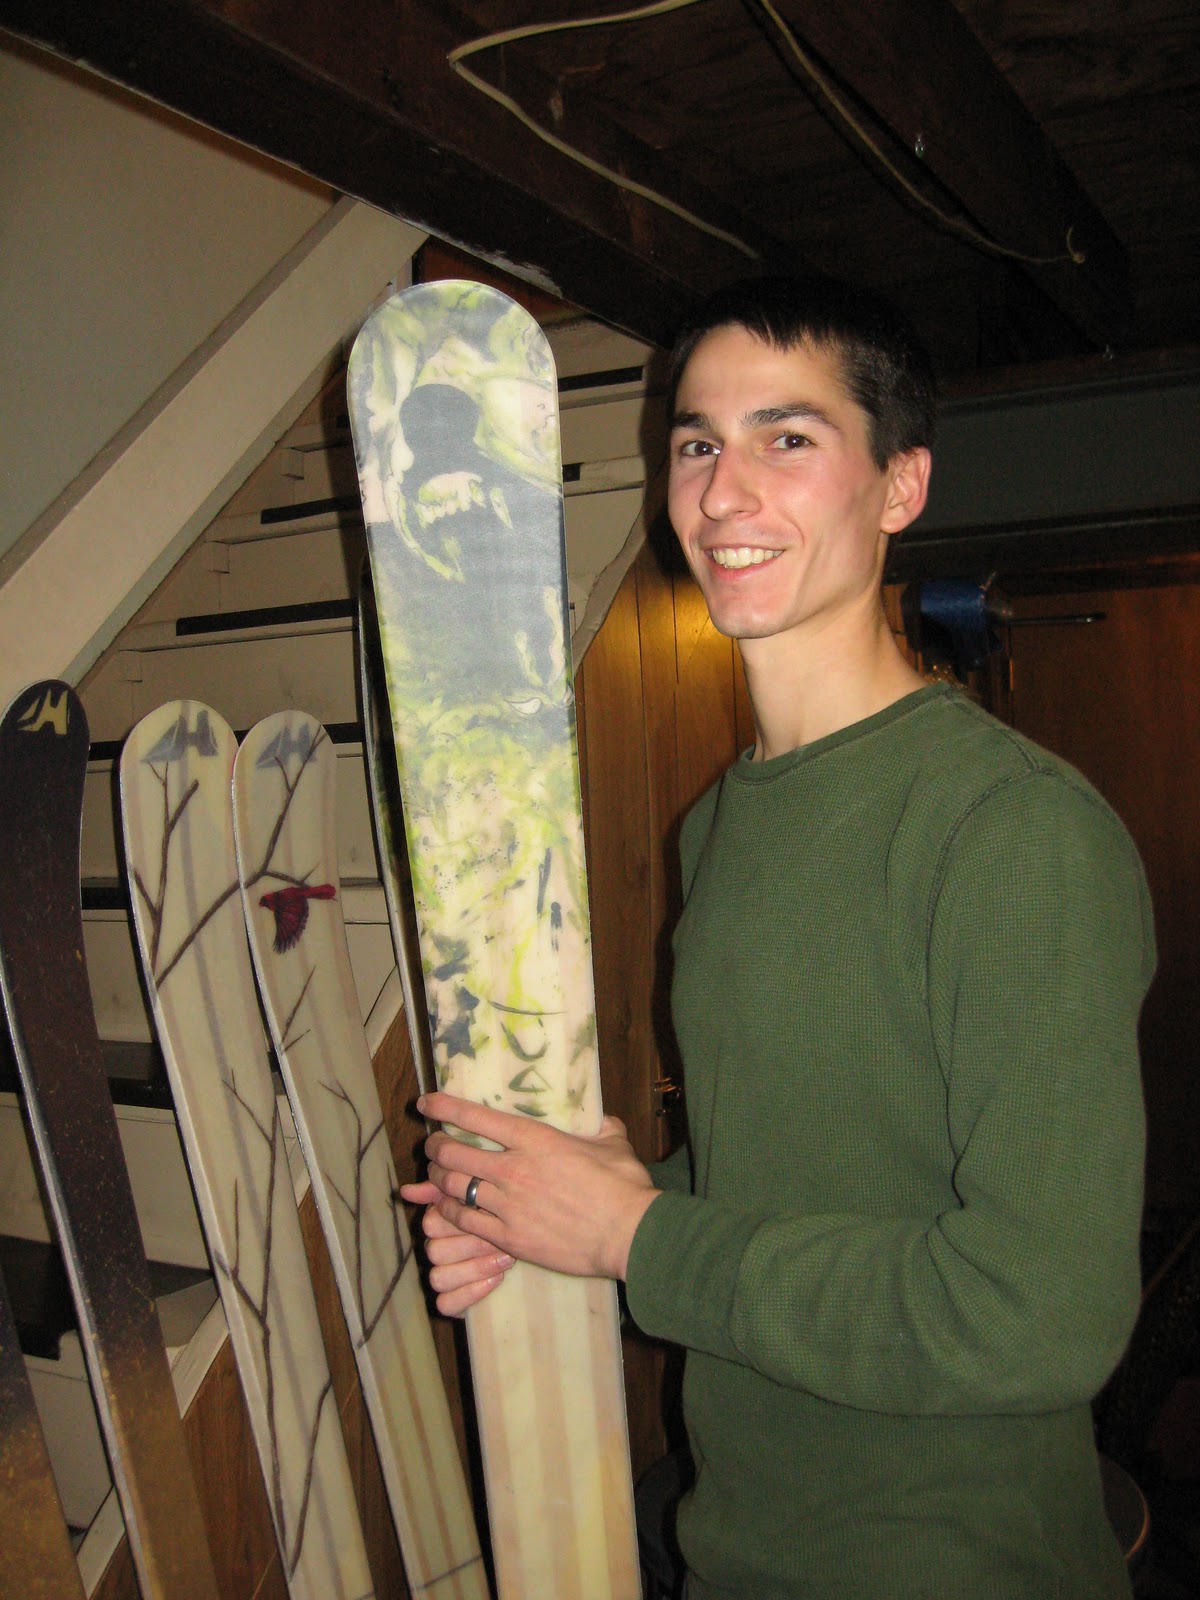
The skis I made for Matt, the Panjshir, use a similar technique in painting on both the wood and paper.  The focal point of these skis is the wolf graphic.


The Arlia's I am making for Rachel take a different approach using purple fabric and gold paint.  The fabric, when soaked in epoxy will become several shades darker.  The JH on this ski is made from gold leaf.


Once the graphics are complete the skis are ready to be pressed for the second time.  The built in alignment features on the mold makes this process as easy as setting the ski on the mold applying epoxy, fiberglass, the graphics layer and the top sheet.


A small paint roller can be used to remove bubbles from underneath the top sheet.  It works best to start the roller at the center and work towards the tip and the tail pushing the wave of bubbles out of the ski.


Since this is a cap design, the top sheet must fold over the sides of the ski.  The air bladder will do this to a certain extent on its own, but I use 2" of foam to help press the top sheet to the edges of the ski.


As always I use rubber gloves and a foam brush to spread the epoxy.


This is a picture of Megan's Arlia when first removed from the press.


The following video shows the layup and stage two press at 16x speed (complete with music!).


The images below show the skis as pressed with the flashing still connected to the ski.  The only steps left are to trim the flashing, sand the edges, and remove the protective tape from the top and bottom of the ski.