Showing posts with label fiberglass. Show all posts

Sunday, November 23, 2014

All Mountain Radacoski (AMR-14)

It's been a busy year, but I am currently making a pair of skis for a friend, Matt Radacosky.  I am also in the process of building a new ski press from steel, but will post about that later. This year I am making a pair of eastern all mountain/freeride skis similar to the Aftermath of last year, but wider.  The aftermath is 127-88-109, 53% of the ski is in front of center, and has a turn radius of 17.7m.  The AMR-14 is 128-100-118, 51% of the ski is in front of center, and has a turn radius of 19.9m.  You can see the difference between the skis below.


I am also going with a sidewall design this year rather than the cap design.  I expect the ski to be a little heavier, but should be more responsive in turns. One change I am making this year is using a basalt fiber instead of fiberglass - basalt is made from igneous rock. Here is some info about basalt:

Basalt fiber is a material made from extremely fine fibers of basalt, which is composed of the minerals plagioclase, pyroxene, and olivine. It is similar to carbon fiber and fiberglass, having better physicomechanical properties than fiberglass, but being significantly cheaper than carbon fiber. (http://en.wikipedia.org/wiki/Basalt_fiber)

...the basalt/epoxy sample's strength tested 13.7 percent higher than that of the E-glass sample and exhibited 17.5 percent greater stiffness, although the basalt sample was 3.6 percent heavier than the E-glass sample. Additionally, basalt fibers are naturally resistant to ultraviolet (UV) and high-energy electromagnetic radiation, maintain their properties in cold temperatures, and provides better acid resistance. (http://www.compositesworld.com/articles/basalt-fibers-alternative-to-glass)

 Relative tensile strengths (breaking strength) are listed below:

Steel                  73000 psi  (0.50 GPa)
E-glass            500000 psi  (3.45 GPa)
Basalt              600000 psi  (4.15 GPa)
Carbon Fiber   725000 psi  (5.00 GPa)


After some extensive searching, I found some quad-axial basalt fabric from a company in Germany -iXperial (http://www.ixperial.net/). I highly recommend them; this shipment was fast and the customer service was excellent. Most fiberglass in skis is tri-axial, meaning that it is layered along three axes.  The basalt fiber I ordered is layerd on four.  The basalt will be visible through the topsheet and graphics layer.


This year I purchased a new 2.5HP router and a 6 Amp jig saw.  If I could afford a large bandsaw I'd have one.  The extra power in these tools over my past tools makes a big difference in cutting time and surface finish.  The core of the ski is nearly identical to the Aftermath, but substitutes pine for the cedar.  It still uses 3 oak stringers, 5mm wide, along with Aspen and Poplar. Photos of the core in process are below.


The base material is simlilar to last year and is a 4001 grade sintered P-Tex. This year I was able to get the base template and core member template printed on the same sheet, which saved some time and money.  The base in process is below.


I did run into a problem this year; after I cut out the base and superglued on the edges, I realized that one base had warped out of shape.  I have speculated that it had something to do with internal stresses in the base material.  When the material was cut, the stresses were relieved and it warped.  It's common in steel and I have seen it in plastic tubing before.  I had to re-order the base material and try again.  This time I cut out the base roughly at first, leaving about 1 inch to the template.  I then took a second pass using the template and it turned out fine.

I am returning to the sidewall design again this year.  The following pictures illustrate attaching the sidewalls to the core, planing the core, and profiling the core.


My friends Matt and Shane;  Shane is determined to make skis with me for a living; I forced them both to wear hearing protection.


Once the skis were profiled, I used my belt sander and 50 grit sand paper to smooth out the surface after routing. One thing I was worried about, after my last experience with sidewalls, was getting the sidewall to stick to the epoxy.  Ideally, the plastic surface would be very rough with a surface finish that looks like that of the base material.  The 50 grit belt seemed to do the job quite well as shown below.  The surface looks like it does when it is abraded at the factory. This will give the epoxy "hairs" to grab onto as it forms a mechanical bond.  A lesser grit would produce a cleaner looking surface, but would not bond as well.


The next step is to finish the graphics layer, prep the top sheet and basalt layers, and press the skis.
 
Here is a preview of the new ski press.


Wednesday, December 11, 2013

Press Stage 2

In past years I have created the graphic on cotton cloth or on paper, but this year my sister (Emily) and I decided to create the graphic directly on the wood core.  In order to do this, we wanted to first stain the wood to get a deeper background color.  I wasn't sure if this epoxy would still stick to the stain, so I performed a test.


The test showed that although the epoxy didn't stick as well on the stain as on bare wood, it would be sufficient to keep the top sheet on during use.  Based on the successful test, I stained both skis.


Next, my sister, with a small amount of help from me, painted the ski graphic.  The graphic is based on Revelation 19:11-13:

11 I saw heaven standing open and there before me was a white horse, whose rider is called Faithful and True. With justice he judges and wages war. 12 His eyes are like blazing fire, and on his head are many crowns. He has a name written on him that no one knows but he himself. 13 He is dressed in a robe dipped in blood, and his name is the Word of God.
  
The graphic was intentionally made with great detail on the tail of the ski and with much less detail at the tip.


Next the skis were put in the press. A full sheet of fiberglass was not place on the top of the ski, only a narrow strip was placed on each edge of the ski.


The flashing was trimmed off with a jig saw and the edges were finished with a bench top belt sander and hand belt sander.


The final step was to peel off the tape that was protecting the top sheet and base.  This was done relatively easily, but it would have helped if the tape was a little thicker to prevent it from tearing.


Prior to pressing the skis, I placed a nameplate at boot center on each ski.
 

 The only thing left to do is mount the bindings and tune the skis.


Friday, September 13, 2013

Layer Prep

To get the ski ready to press, the edges, base, fiberglass, rubber, and top sheet must be prepared.  This year I purchased clear base material which will allow me to put some graphics on the bottom of the ski.  A razor blade and the base template are used to cut the base material to size.


 The edges are clamped in place and temporarily attached using super glue.


The image below illustrates the opacity of the base material.  When epoxy is applied, the material will become more clear.  The edges, black rubber, graphics, and core design will show clearly.


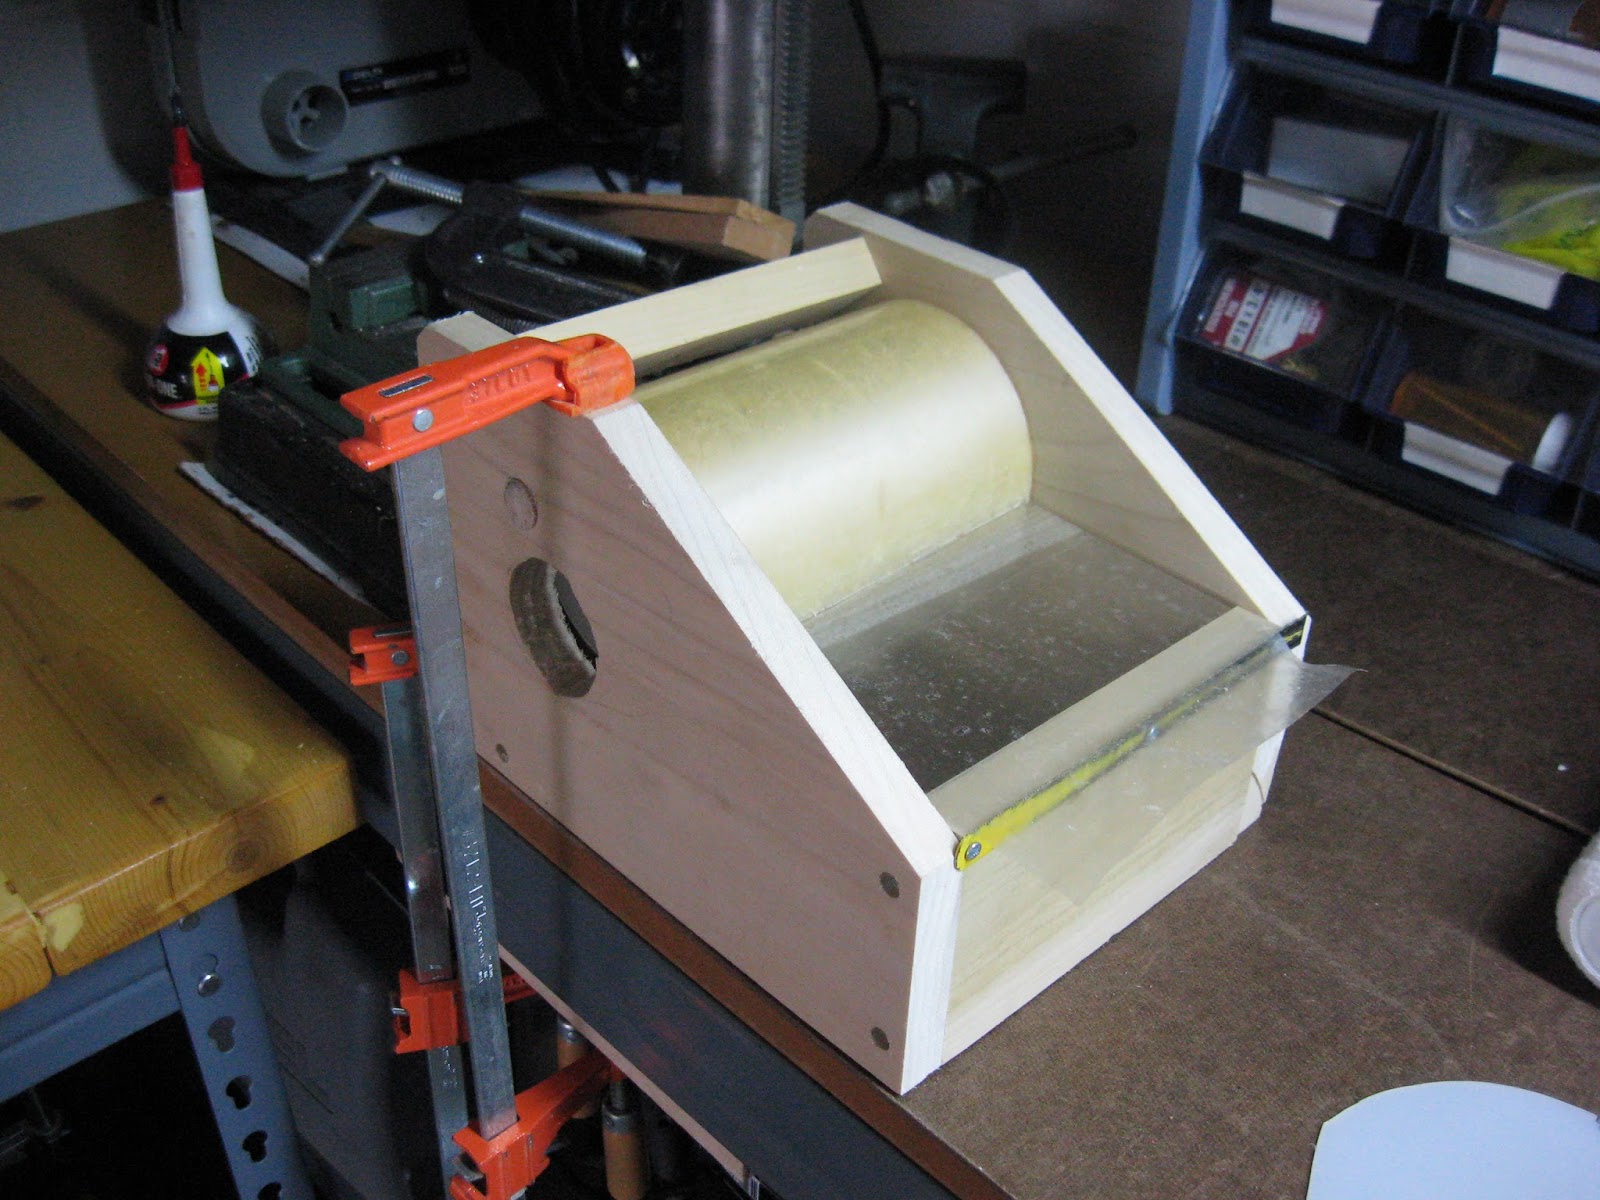
In order to protect the base from epoxy and damage, tape is applied.  This year I purchased 6" wide label tape from McMaster-Carr.  In past years I have used both contact paper and packing tape which both have their difficulties. Packing tape is applied in strips, and any overlap will leave minor depressions in the base material.  Contact paper uniformly covered the base, but was hard to apply and remove. This tape was by far the easiest to apply out of anything I used.  I built a tape dispenser to help me apply the tape to the base.


Once the tape was stretched out, a paint roller was used to evenly apply the tape to the base.  Because there was tension in the tape during application, there were no creases or bubbles.


The extra tape was then trimmed using a razor blade.

The top sheet, made from p-tex, is also clear and was cut in half and covered in tape similar to the base material.

Rubber is placed between the steel edge and fiberglass layer in order to prevent delamination due to shear between layers. The rubber comes in a roll and was simply cut into four pieces.


There is a fiberglass later between the base and core and between the core and top sheet.  The fiberglass on the base is 19 oz with a tri-axial weave (45, 90, and 135 degrees).


I did not purchase new fiberglass for the top of the core, but used some old bi-axial fiberglass (0 and 90 degrees).  Rather than covering the entire top of the ski, which adds considerable weight, only the edges will be covered.  This strip of fiberglass was cut into four pieces.


The ski is nearly ready to enter press stage one; however, graphics will be applied to the core prior to pressing.