Showing posts with label top sheet. Show all posts

Wednesday, December 11, 2013

Press Stage 2

In past years I have created the graphic on cotton cloth or on paper, but this year my sister (Emily) and I decided to create the graphic directly on the wood core.  In order to do this, we wanted to first stain the wood to get a deeper background color.  I wasn't sure if this epoxy would still stick to the stain, so I performed a test.


The test showed that although the epoxy didn't stick as well on the stain as on bare wood, it would be sufficient to keep the top sheet on during use.  Based on the successful test, I stained both skis.


Next, my sister, with a small amount of help from me, painted the ski graphic.  The graphic is based on Revelation 19:11-13:

11 I saw heaven standing open and there before me was a white horse, whose rider is called Faithful and True. With justice he judges and wages war. 12 His eyes are like blazing fire, and on his head are many crowns. He has a name written on him that no one knows but he himself. 13 He is dressed in a robe dipped in blood, and his name is the Word of God.
  
The graphic was intentionally made with great detail on the tail of the ski and with much less detail at the tip.


Next the skis were put in the press. A full sheet of fiberglass was not place on the top of the ski, only a narrow strip was placed on each edge of the ski.


The flashing was trimmed off with a jig saw and the edges were finished with a bench top belt sander and hand belt sander.


The final step was to peel off the tape that was protecting the top sheet and base.  This was done relatively easily, but it would have helped if the tape was a little thicker to prevent it from tearing.


Prior to pressing the skis, I placed a nameplate at boot center on each ski.
 

 The only thing left to do is mount the bindings and tune the skis.


Friday, September 13, 2013

Layer Prep

To get the ski ready to press, the edges, base, fiberglass, rubber, and top sheet must be prepared.  This year I purchased clear base material which will allow me to put some graphics on the bottom of the ski.  A razor blade and the base template are used to cut the base material to size.


 The edges are clamped in place and temporarily attached using super glue.


The image below illustrates the opacity of the base material.  When epoxy is applied, the material will become more clear.  The edges, black rubber, graphics, and core design will show clearly.


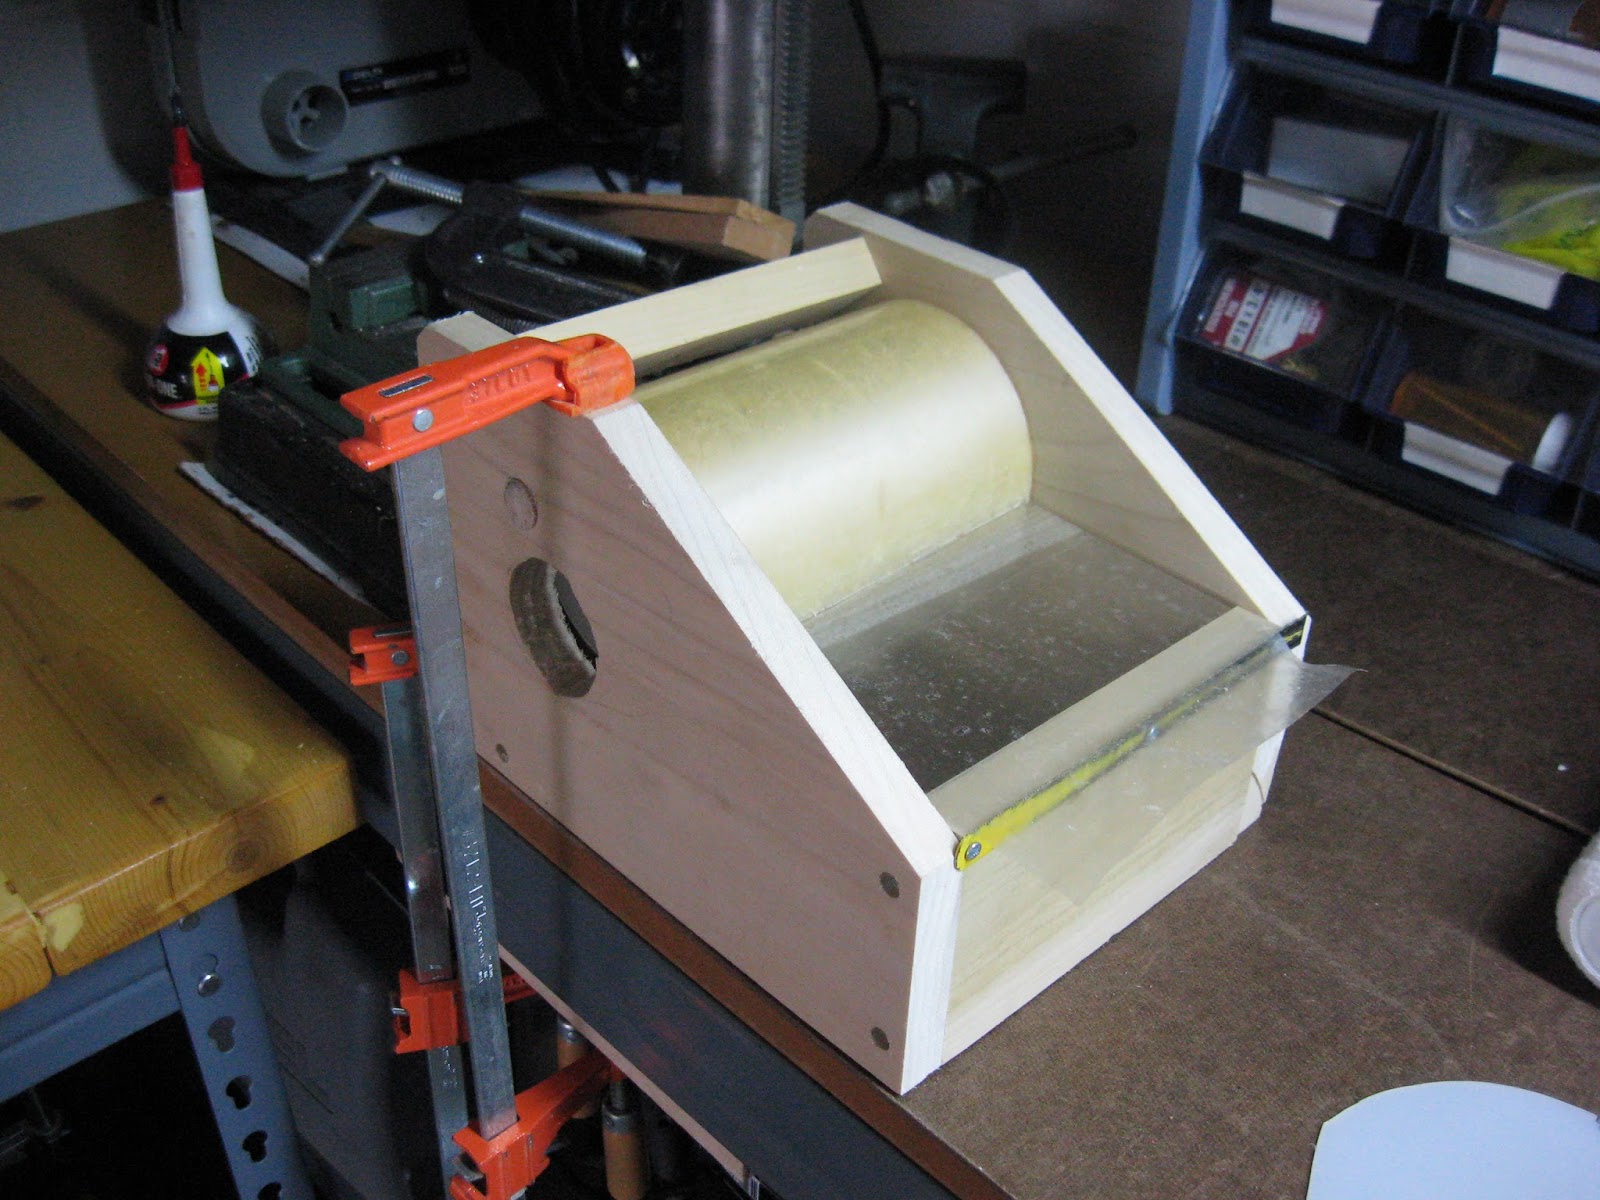
In order to protect the base from epoxy and damage, tape is applied.  This year I purchased 6" wide label tape from McMaster-Carr.  In past years I have used both contact paper and packing tape which both have their difficulties. Packing tape is applied in strips, and any overlap will leave minor depressions in the base material.  Contact paper uniformly covered the base, but was hard to apply and remove. This tape was by far the easiest to apply out of anything I used.  I built a tape dispenser to help me apply the tape to the base.


Once the tape was stretched out, a paint roller was used to evenly apply the tape to the base.  Because there was tension in the tape during application, there were no creases or bubbles.


The extra tape was then trimmed using a razor blade.

The top sheet, made from p-tex, is also clear and was cut in half and covered in tape similar to the base material.

Rubber is placed between the steel edge and fiberglass layer in order to prevent delamination due to shear between layers. The rubber comes in a roll and was simply cut into four pieces.


There is a fiberglass later between the base and core and between the core and top sheet.  The fiberglass on the base is 19 oz with a tri-axial weave (45, 90, and 135 degrees).


I did not purchase new fiberglass for the top of the core, but used some old bi-axial fiberglass (0 and 90 degrees).  Rather than covering the entire top of the ski, which adds considerable weight, only the edges will be covered.  This strip of fiberglass was cut into four pieces.


The ski is nearly ready to enter press stage one; however, graphics will be applied to the core prior to pressing.

Monday, December 17, 2012

Tuning and Final Modifications

This year I had a buddy at work, Matt, who happened to work at a local shop, help me tune the skis and mount the bindings.  Once this was done I waxed the skis; I used Swix all temperature universal wax.


Once waxed, I sealed the edges with epoxy; I do this because the sanding and tuning process can remove enough material near the edge to expose wood.  The epoxy prevents any water from entering the base.  I also repaired a few areas on the tails that had pulled up during the process of trimming the flashing.  To do this, I put epoxy under the top sheet using a toothpick and then used packing tape to hold the top sheet in place during the repair.


While I was at it, I patched up the top sheets of a few other pairs of skis that had been nicked during previous use.


The final step I took was to cut a small notch in the back of the ski to allow my climbing skins to hook onto the ski better.  I did this by measuring the hook on my skins and then marked the ski with a permanent marker.


I then used a belt sander to grind out the notch; once the notch was cut, I coated the exposed core area with epoxy to seal it.


The skis are now ready for use: