Tuesday, November 8, 2011

Post Processing

Once the skis have been fully pressed, the flashing must be trimmed off and the edges sanded to remove excess epoxy, fiberglass, and topsheet.  Trimming the flashing can be done with a jigsaw or bandsaw; in this case I used a jigsaw.  Note that the blade will heat up quickly and will have to be cooled throughout the trimming process.  I recommend a coarse blade.

The easiest way to trim the flashing is to turn the ski over and cut from the bottom side, using the edge as a guide for your blade.  A dust mask is helpful if you want to enjoy a lifetime use of your lungs.  Protection for your ears and eyes is also recommended for the same reason.


Once the flashing is trimmed off the ski, the edges, including the tip and tail, need to be sanded.  To sand the edges, I find it easiest to clamp the ski on a work bench while supporting the camber of the ski.  A belt sander will do the best job in this case.


To sand the tip and tail I find it easiest to move the ski against the sander vice moving the sander about the ski.  If you have a bench top belt sander, this will work best; I do not have one (yet) so I clamped my belt sander to a work table.  I work the ski from the steel edge towards the tip or tail; this will maintain a nice curve.


Once this is finished, the only production work left on the ski is to remove the protective tape from the tip and the tail.  This is a brute force operation and can be time consuming, but it is always worthwhile to protect the top sheet and base so it looks clean at the end.


I have decided that although packing tape works well to protect the ski from damage during production, it is too much of a pain to use again.  I spent several hours removing the tape from these skis; fortunately, it was during the Steelers game so I did not mind too much.  In the future I recommend the use of a thicker tape.  The problem with packing tape is that it tears very easily which makes removal difficult.  A six inch wide piece of clear contact paper would work far better.  The contact paper is thicker and will not tear easily and is just as sticky.  If you buy an 18 inch wide roll I suggest cutting the whole role to size with a hack saw.


The production portion of the ski making process is now finished.  The base must still be ground, the edges sharpened, the base waxed, and the bindings mounted.  I will let Cycle Sport and Ski do this work for me.

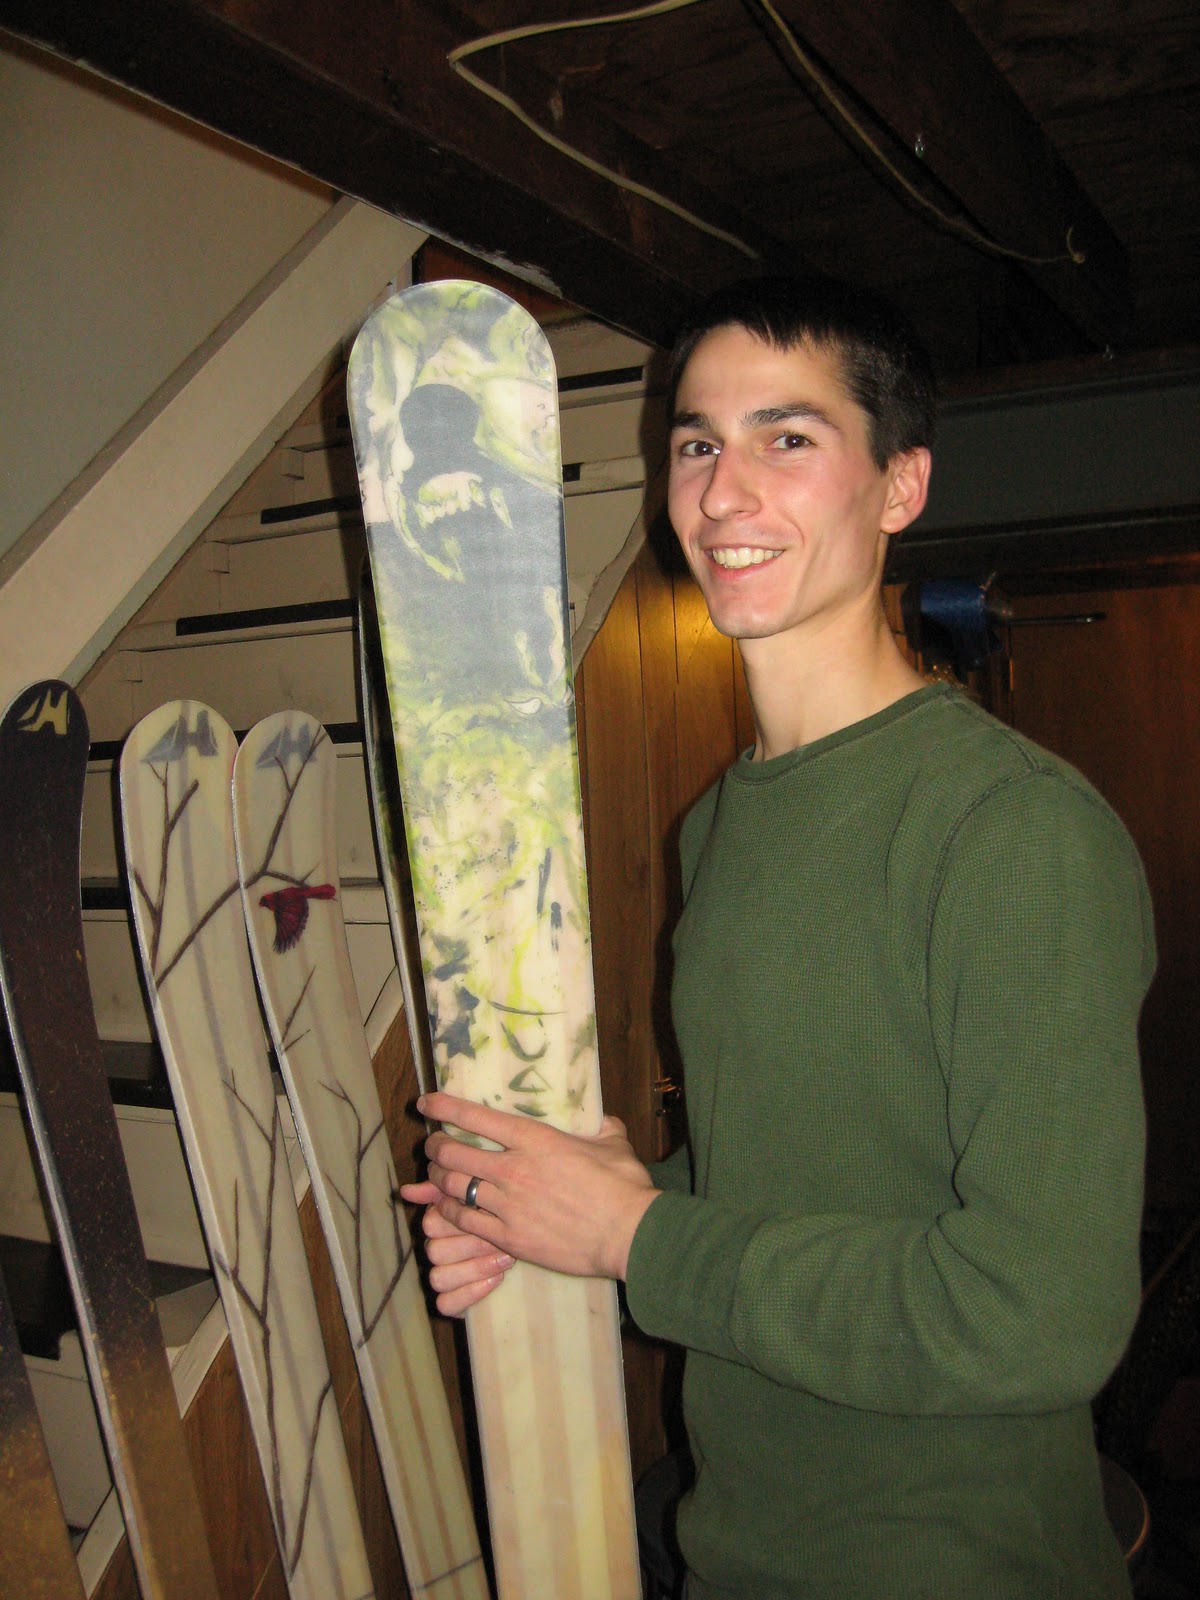
The finished skis:


Sunday, November 6, 2011

Graphics and Press stage 2

There are many options for graphics and most of them are relatively simple to create.  In industry they typically print the design directly onto the plastic top sheet or on a separate layer.  I don't have the technology needed to print directly onto a topsheet, although, I have taken steps toward this method. I just need a larger printer which is not in the budget...


I took two approaches to the graphics this year. The first method was to paint onto paper and directly on to the wood of the ski.  Painting on these two mediums is easily done with acrylic paints.  The paint on the wood will be slightly obscured due to the fiberglass layer between the wood and the top sheet.  The fiberglass becomes mostly clear when soaked in the epoxy.  The paper when soaked in epoxy will become ~75% transparent. The second approach, which I have taken in the past, was to get a sheet of fabric, purple in this case, and paint directly on it.  The advantage to this is that the fabric will be very opaque and you can get a solid color, but it absorbs a lot of epoxy and will add weight to the ski.

Some past designs:

2010 Goliath

 2009 Goliath, this is still one of my favorite graphics.


The Arlia's I am making for Megan have a cardinal as the focal point and are relatively simple.  I wanted the wood to show as part of the graphic as well.  Emily helped me paint the skis; I owe most of the credit to her.


I always place a horizontal line across the ski to indicate the binding center.  Note that this is not necessarily the center of the ski and will often be slightly back of true center.  Without this line it would be difficult to mount the bindings properly.  I also always put my JH symbol on the skis.

The skis I made for Matt, the Panjshir, use a similar technique in painting on both the wood and paper.  The focal point of these skis is the wolf graphic.


The Arlia's I am making for Rachel take a different approach using purple fabric and gold paint.  The fabric, when soaked in epoxy will become several shades darker.  The JH on this ski is made from gold leaf.


Once the graphics are complete the skis are ready to be pressed for the second time.  The built in alignment features on the mold makes this process as easy as setting the ski on the mold applying epoxy, fiberglass, the graphics layer and the top sheet.


A small paint roller can be used to remove bubbles from underneath the top sheet.  It works best to start the roller at the center and work towards the tip and the tail pushing the wave of bubbles out of the ski.


Since this is a cap design, the top sheet must fold over the sides of the ski.  The air bladder will do this to a certain extent on its own, but I use 2" of foam to help press the top sheet to the edges of the ski.


As always I use rubber gloves and a foam brush to spread the epoxy.


This is a picture of Megan's Arlia when first removed from the press.


The following video shows the layup and stage two press at 16x speed (complete with music!).


The images below show the skis as pressed with the flashing still connected to the ski.  The only steps left are to trim the flashing, sand the edges, and remove the protective tape from the top and bottom of the ski.


Friday, October 14, 2011

Ski Press Design Notes

SKI PRESS ONE

I designed my first ski press in early 2009; I was a mechanical engineer less than a year out of college.  I could not afford to build a press out of steel and determined that a press made from wood, if designed properly, would operate just fine and would by 1/10th the cost. The design of my first ski press is outlined below.

The ski press is used to react the pressure from the air bladder when it presses the ski into shape on the mold.  For example, the press is 10 inches wide by 84 inches long. At 25 psi, this is a total force of 10in x 84in x 25 lb/in^2 =21,000 lb or 10.5 tons of force. This is a significant amount of force to react, but illustrates the power and usefulness of an air bladder.

The air bladder is made from 6" diameter marine discharge hose rated for 70psi.  The ends are bolted closed with angle iron and are sealed with silicone caulking.  A pass-through-wall valve was used to attache the air hose.


I designed the press to work at 30 psi and pressure tested it.  I used it to press my first two skis and it worked well.  I then pressurized it for the third ski.  After pressurizing to 30 psi, I looked up and notice the second brace back from the front had cracked left of center and was bowing outward.  The press was stable, but I decided I should decrease the pressure and try to save the ski.  As soon as I decreased the pressure the brace snapped clean through, causing a chain reaction breaking all but the last two braces.


When I realized what happened I knew the ski was lost as the epoxy hardened it into a shapeless ski.  I few seconds later I could feel my mouth getting warmer and filling up with blood.  The pressure relief valve was connected to the ski bladder and when I relieved the pressure the front brace broke outward and struck my jaw. My teeth went into the side of my cheek and I ended up needing two stitches in my mouth.  I did have safety glasses on and eventually noticed bruising on the bridge of my nose where the glasses protected my eyes.

RECOVERY

I share this story so that the  people can learn from my mistakes.  There were several things wrong with my press which I corrected.

  1. The cause of failure was a stress concentration in the second brace.  I had drilled a hole through the cross brace (see part 10 above) so that a bolt could pass through and suspend the platform (Part 3).  The stress around this hole was approximately 3X higher than in the rest of the brace.  This location fatigued after three uses and cracked on the fourth. To correct this problem I used metal straps to connect the cross braces to the platform.
  2. The platform (Part 3) as shown in the image above was free to bow as the pressure increased.  Therefore the cross brace was in full bending, maximizing the stress.  To correct this problem I attached plywood to the top of the platform
  3. The pressure gages and relief valve was attached to the bladder.  I moved this to the other end of the hose for future pressing to keep my body away from the press in the event of a failure.
In addition to the items noted above I redesigned the press for a much higher safety factor and took pure bending into consideration in my calculations.  I added two additional braces to the press and made the braces from 2x6 lumber in lieu of 2x4 lumber. The calculations I did are shown below:

 These calculations show a safety factor of 5.32 at an operating pressure of 22psi.  Additionally, I ran a finite element analysis of the bracing with the old design (left) and the new design (right).  This design change shows dramatic reduction in the stress levels.

To rebuild the press I salvaged what I could from the wreckage and started over.

The finished press:


 Comparison of the old press bracing size to the new brace.


I managed to salvage the core of the ski by tearing of the base and the top sheet and then sanding any remaining epoxy and the graphics layer away.


The redesigned press has worked now for 16 presses and 3 pressure tests and shows no signs of fatigue.  To prevent such a failure again I inspect the press for cracks prior to every use. There were some cracks that existed in the wood at the initial build, but those cracks have not propagated no significant cracks have been noted since it was designed.  I also pressure test the press prior to a round of pressing to ensure the press is in good shape as well as the air bladder.  Additionally, I put on my face shield prior to pressurizing the press after which my adrenaline always starts pumping.

A final note, whether or not you are an engineer, take care in the design of your ski press and always build redundancies into the system; if you don't know what you're doing, then get someone who does to review your work.


Press, Stage One

Depending on the design of your skis and your ability to precisely machine the shape of the ski, pressing the ski can be done in a single stage or in multiple.  The first skis I designed had plastic sidewalls and they were pressed in a single stage. 


Adding a plastic side wall gives the ski a clean look and will protect the core from damage.  They add expense and time to the design as they have to be attached with epoxy to the core.  The plastic used for the sidewall (P-tex) is more dense than wood and has a lower modulus of elasticity (much more flexible) and therefore adds weight to the ski without adding strength.

The cap design is simpler and doesn't require that a plastic sidewall be used.  The core is beveled on the edges and the top sheet is wrapped down over the edge of the the core.  This design reduces the weight of the ski because beveling the core removes material.  Beveling the edges does not compromise the strength of the ski because when the ski is used to make a turn, force is applied at the edge of the ski and is reacted by the boot/binding.  The bending stress across the cross section is smallest at the edge of the ski and increases linear towards the boot mounting point.


The complication that this design adds is that the core must be beveled to allow a cap to be used.  Since I do not have the ability to precisely machine the core to the size of the base, I use a two-stage pressing process.  In the first stage, the base, edges, fiberglass, rubber and core are molded together.  Once pressed, the flashing is trimmed off and the core is beveled precisely using the edge of the ski as a guide. In the second stage the second fiberglass layer, graphics, and top sheet are pressed to the stage one press group.

One of the key steps in pressing the ski is to get the base and the core properly aligned.  In order to do this, I constructed a jig for the mold using ski edging which would precisely align the base and edges.


In order to align the core I glue two pre-drilled blocks of wood to the side of the core at the centerline.  Prior to final layup, I align the core to the base on the mold and drill alignment holes through the predrilled blocks of wood.  Finish nails will be place through the hole in the block of wood on the core and into the holes in the mold for alignment.  A more complex and repeatable method could be designed for this process, but I have low volume production and this method works well.


Once the alignment pieces are attached to the core and a test alignment has been completed, all of the components of the ski need to be staged for layup.  First, a piece of thin plastic is placed on the mold; this is used to prevent extra epoxy from sticking to the mold and ruining it.  The base and edges are then put in place.  The core, fiberglass, and rubber strips are then staged near the mold.  A foam brush is also staged for spreading the epoxy.  The reverse mold, air bladder, and air compressor must also be staged.


Once the components are stage, the expoxy needs to be mixed.  This year I used West System epoxy.  The hardener I chose, 206, is used for a slow cure time.  The usable time is anywhere from 30-45 minutes with this epoxy.  After this time the epoxy starts to harden. At 9-12 hours the epoxy reaches full hardness and reaches full strength by 24 hours.  I always recommend rubber gloves (chemical resistant) and safety glasses.  A well ventilated area is also recommended.


Once the epoxy is mixed it is time to apply it to the ski and place the ski in the press.  The following video is shown at 12X speed and demonstrates this process.


I typically leave the skis in the press for at least 12 hours. Once this time period is passed you can remove the ski from the press.  The ski after pressing looks like the  following:


The following photo illustrates the shape of the ski after molding.  Since the ski is pressed into shape, stress is locked into the wood and will cause the ski to spring back a small amount when it is removed from the mold.  To compensate for this, the mold must exagerate the shape of the ski.  For the Arlia's shown below, the camber on the mold was designed at 30mm expecting a final camber of 15mm.  A measurement after removal from the mold showed a camber of 14mm.


The next step is to trim the flashing (http://en.wikipedia.org/wiki/Molding_flash) from the ski.  This can be done with a band saw, router, or jig saw.  Since my band saw is out of comission this season, I used my jig saw.  In order to save a step I set the jig saw to a 30 degree angle and cut the bevel of the core at the same time.


Trimming the flashing is one of the more difficult processes because it is time consuming and the cutting tool wears out quickly.  The jig saw blade cuts through epoxy, fiberglass, and the wood core;  at the same time the edge of the ski is used as a guide.  All these factors cause the blade to build up heat quickly.  After every six inches of cut, the blade had to be cooled, otherwise it would overheat causing the metal to soften and the teeth to wear more quickly.  A coarse tooth, quick cutting blade is reccomended over a fine tooth blade (clean cutting) as it will cut quicker and last longer.


Once the flashing is trimmed and the bevel is created, a belt sander is used to even out any flaws in the cut and create a rounded edge where the bevel meets the top of the ski.

Once this is complete the ski is ready for stage two pressing.