Tuesday, November 8, 2011

Post Processing

Once the skis have been fully pressed, the flashing must be trimmed off and the edges sanded to remove excess epoxy, fiberglass, and topsheet.  Trimming the flashing can be done with a jigsaw or bandsaw; in this case I used a jigsaw.  Note that the blade will heat up quickly and will have to be cooled throughout the trimming process.  I recommend a coarse blade.

The easiest way to trim the flashing is to turn the ski over and cut from the bottom side, using the edge as a guide for your blade.  A dust mask is helpful if you want to enjoy a lifetime use of your lungs.  Protection for your ears and eyes is also recommended for the same reason.


Once the flashing is trimmed off the ski, the edges, including the tip and tail, need to be sanded.  To sand the edges, I find it easiest to clamp the ski on a work bench while supporting the camber of the ski.  A belt sander will do the best job in this case.


To sand the tip and tail I find it easiest to move the ski against the sander vice moving the sander about the ski.  If you have a bench top belt sander, this will work best; I do not have one (yet) so I clamped my belt sander to a work table.  I work the ski from the steel edge towards the tip or tail; this will maintain a nice curve.


Once this is finished, the only production work left on the ski is to remove the protective tape from the tip and the tail.  This is a brute force operation and can be time consuming, but it is always worthwhile to protect the top sheet and base so it looks clean at the end.


I have decided that although packing tape works well to protect the ski from damage during production, it is too much of a pain to use again.  I spent several hours removing the tape from these skis; fortunately, it was during the Steelers game so I did not mind too much.  In the future I recommend the use of a thicker tape.  The problem with packing tape is that it tears very easily which makes removal difficult.  A six inch wide piece of clear contact paper would work far better.  The contact paper is thicker and will not tear easily and is just as sticky.  If you buy an 18 inch wide roll I suggest cutting the whole role to size with a hack saw.


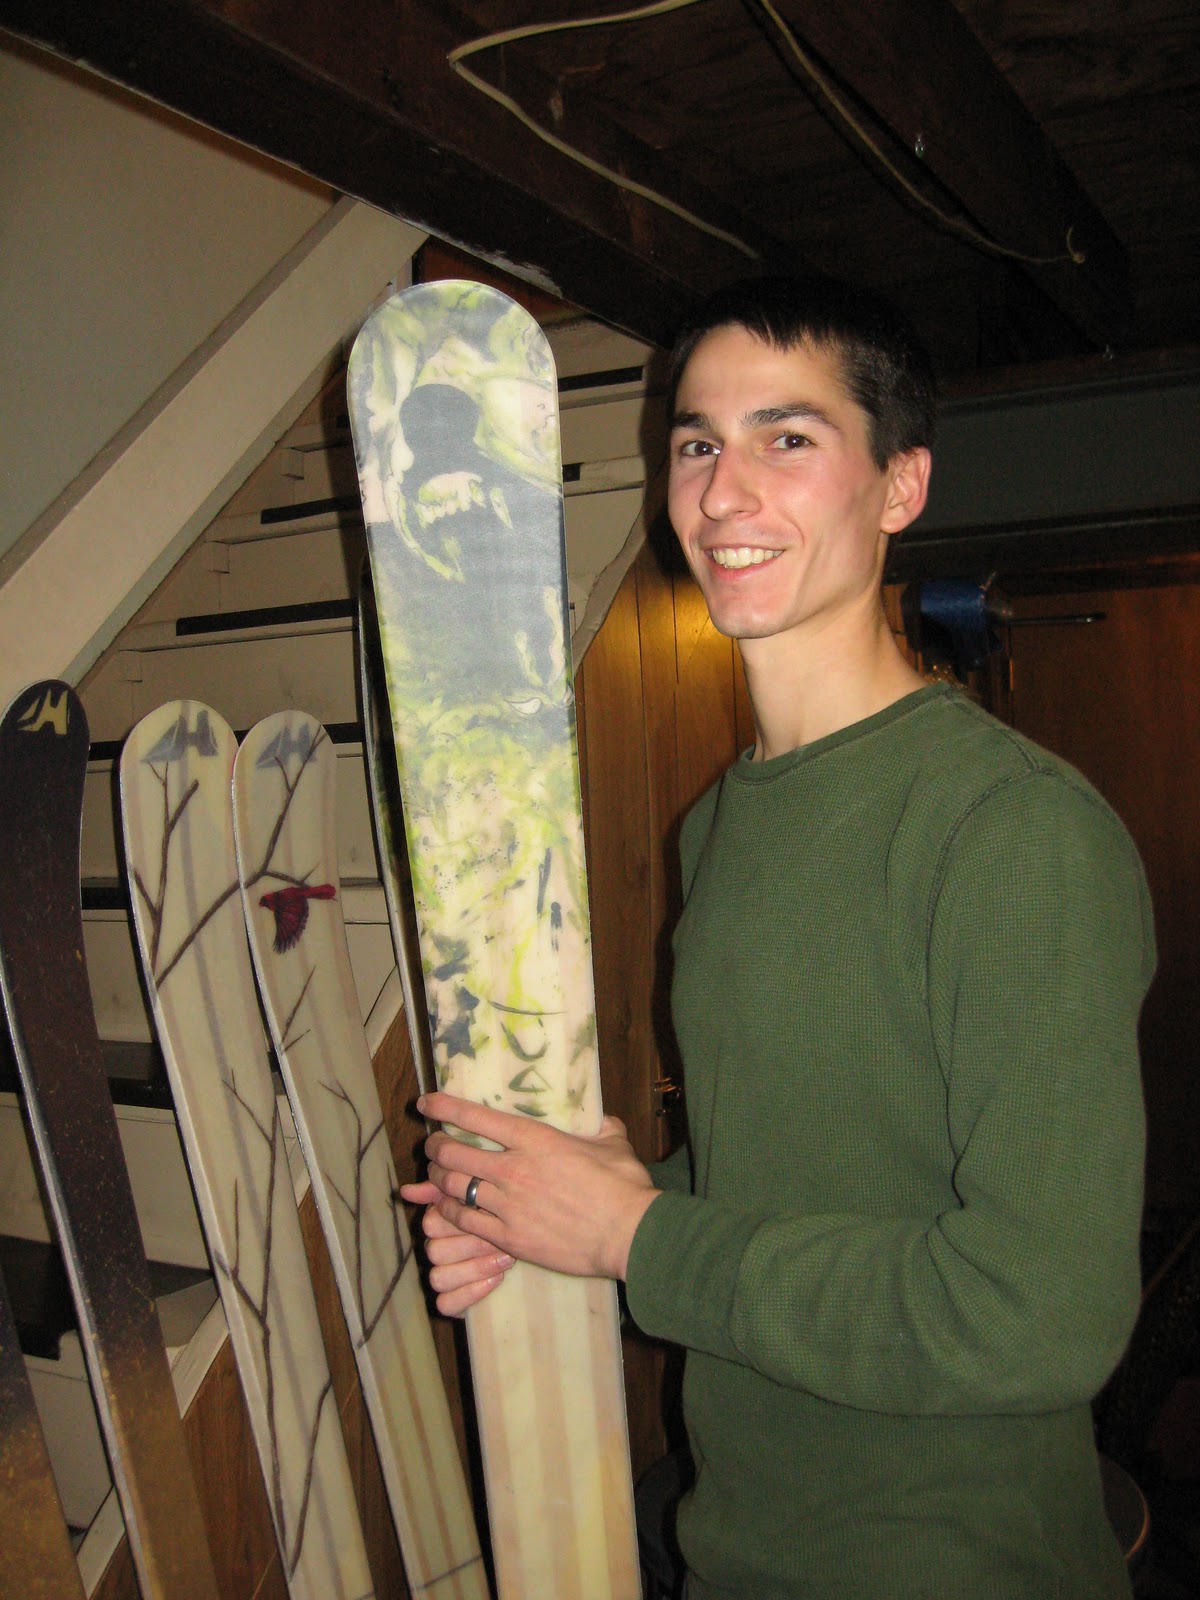
The production portion of the ski making process is now finished.  The base must still be ground, the edges sharpened, the base waxed, and the bindings mounted.  I will let Cycle Sport and Ski do this work for me.

The finished skis:


Sunday, November 6, 2011

Graphics and Press stage 2

There are many options for graphics and most of them are relatively simple to create.  In industry they typically print the design directly onto the plastic top sheet or on a separate layer.  I don't have the technology needed to print directly onto a topsheet, although, I have taken steps toward this method. I just need a larger printer which is not in the budget...


I took two approaches to the graphics this year. The first method was to paint onto paper and directly on to the wood of the ski.  Painting on these two mediums is easily done with acrylic paints.  The paint on the wood will be slightly obscured due to the fiberglass layer between the wood and the top sheet.  The fiberglass becomes mostly clear when soaked in the epoxy.  The paper when soaked in epoxy will become ~75% transparent. The second approach, which I have taken in the past, was to get a sheet of fabric, purple in this case, and paint directly on it.  The advantage to this is that the fabric will be very opaque and you can get a solid color, but it absorbs a lot of epoxy and will add weight to the ski.

Some past designs:

2010 Goliath

 2009 Goliath, this is still one of my favorite graphics.


The Arlia's I am making for Megan have a cardinal as the focal point and are relatively simple.  I wanted the wood to show as part of the graphic as well.  Emily helped me paint the skis; I owe most of the credit to her.


I always place a horizontal line across the ski to indicate the binding center.  Note that this is not necessarily the center of the ski and will often be slightly back of true center.  Without this line it would be difficult to mount the bindings properly.  I also always put my JH symbol on the skis.

The skis I made for Matt, the Panjshir, use a similar technique in painting on both the wood and paper.  The focal point of these skis is the wolf graphic.


The Arlia's I am making for Rachel take a different approach using purple fabric and gold paint.  The fabric, when soaked in epoxy will become several shades darker.  The JH on this ski is made from gold leaf.


Once the graphics are complete the skis are ready to be pressed for the second time.  The built in alignment features on the mold makes this process as easy as setting the ski on the mold applying epoxy, fiberglass, the graphics layer and the top sheet.


A small paint roller can be used to remove bubbles from underneath the top sheet.  It works best to start the roller at the center and work towards the tip and the tail pushing the wave of bubbles out of the ski.


Since this is a cap design, the top sheet must fold over the sides of the ski.  The air bladder will do this to a certain extent on its own, but I use 2" of foam to help press the top sheet to the edges of the ski.


As always I use rubber gloves and a foam brush to spread the epoxy.


This is a picture of Megan's Arlia when first removed from the press.


The following video shows the layup and stage two press at 16x speed (complete with music!).


The images below show the skis as pressed with the flashing still connected to the ski.  The only steps left are to trim the flashing, sand the edges, and remove the protective tape from the top and bottom of the ski.